

The Star Shaped Box Tutorial
Well hallo there everybody.
My posts have been far and wide apart…not ideal! Especially because I’m yet to post what inspired the blog in the first place. So today I’m sharing a tutorial related to card making.
I’ve resently had a lot of clients interested in buying favour boxes for different occassions but preffered to add their personal touch to the assembled boxes. I really always try to assist my clients as best I can, so in a weird turn of events I ended up making DIY box packs. Loving it! So here is a star box tutorial for a 16 year old girl’s birthday! It can be adapted for any ocassion though.
Supplies:

1. A scoring board
2. Bone folder
3. Glue
4. Flowers and ribbon to decorate
5. Intricate Studios box pack:
- the pack includes: box base, box lid and different toppers
- Cut and ready to assemble…so let’s have fun!
Step 1:
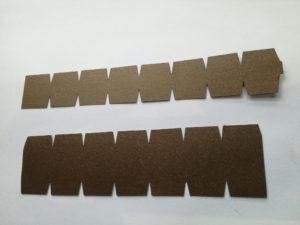

Use the larger strip of paper for the body of the star and the smaller one for the lid. In order for your star to take shape you’ll need a strip with 10 taps. The provided strip has 9 taps(…because 10 does not fit to an A4). so you’ll need to glue on the extra tap included in the pack to complete the strip. This applies to both the box and the lid strips. (We can provide scored boxes also)
Step 2:
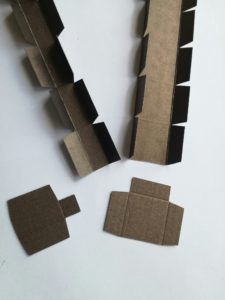
Score both strips lengthwise at ½ inch (about 7cm) on both sides for the box and 1/8 (about 3cm) of an inch for the lid to create the body and flaps to the strips.


Step 3:
Turn your strip araound and score on the short side from each V-shaped cut at the top to the bottom. This will give you 9 taps and a small tap at the end. Now adhere the shorter taps the longer to make 10.
Fold in the one side of the side taps and glue to the inside. This will cause the body of your box and of the lid to be sturdy and give a clean finish to the top of your box.
Step 4:
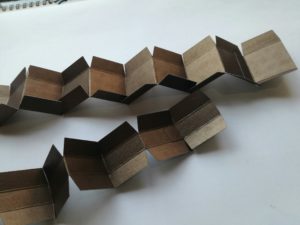


Fold your strips mountain valley style. At this point you may want to decorate the inside of your box with a strip of coloured paper or pattern paper or ribbon to hide the taps you’ve glue on. Go ahead and decorate the outside as well if you want to.
(Tip: it’s easier to decorate before assembling than after, but do what is easier for you!)
Step 5:
Now you can complete the circle by gluing the extended tap to the other end of the strip.

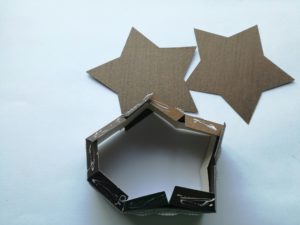
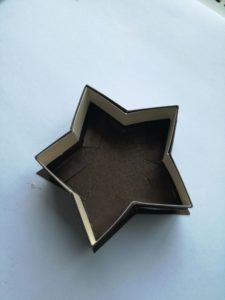
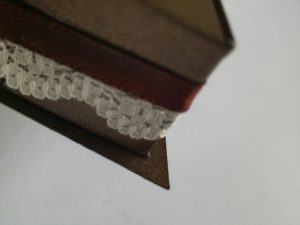
Step 6:
Fold the taps on the other side inward and apply glue. Use one of the provided stars as the base of your box. Follow the shape of the star to help you build your box. Leave a boarder of about an 8th of an inch (approximately 3cm) from the edge of the star.
(Tip: sometimes I apply glue to two taps at a time as I give my box shape; you can apply to all taps and then build your box if it’s easier for you).
(A Good wet glue will allow you to go back and reshape your star until the shape is perfect before it dries up. You need a really good adhesive for this, use hot glue too if you are able to apply it without the mess I usually create if I use it, I stick to a good wet glue). ~ remember, it’s a box, it needs to be dry and sturdy so drying time is important! You may need to hold the taps down before you release and move on to the next tap
Step 7:
(Tip: I wrap the lid tap around the box to guide me on how loose or tight my lid should be before I glue it together).


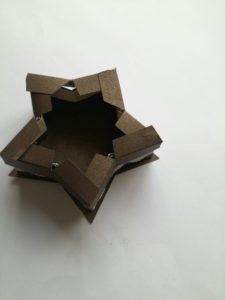


Step 8:
I’ve added two smaller stars in contrasting colours to cover the inside of the box and lid. It’ll give your box a beautiful finish.


You can go to town decorating your box and making it pretty! Here’s how I finished mine.
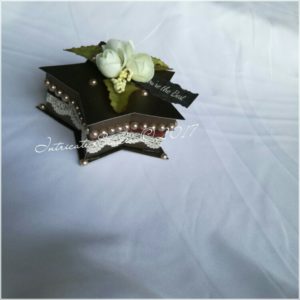


Happy crafting everybody. Remember, Intricate Studios will supply you with DIY packs of whatever gift box you want..we do the hard work for you. Have fun putting them together! Contact us.